
Non-Manifold Edges - Stanis Creative Struggles
The problem
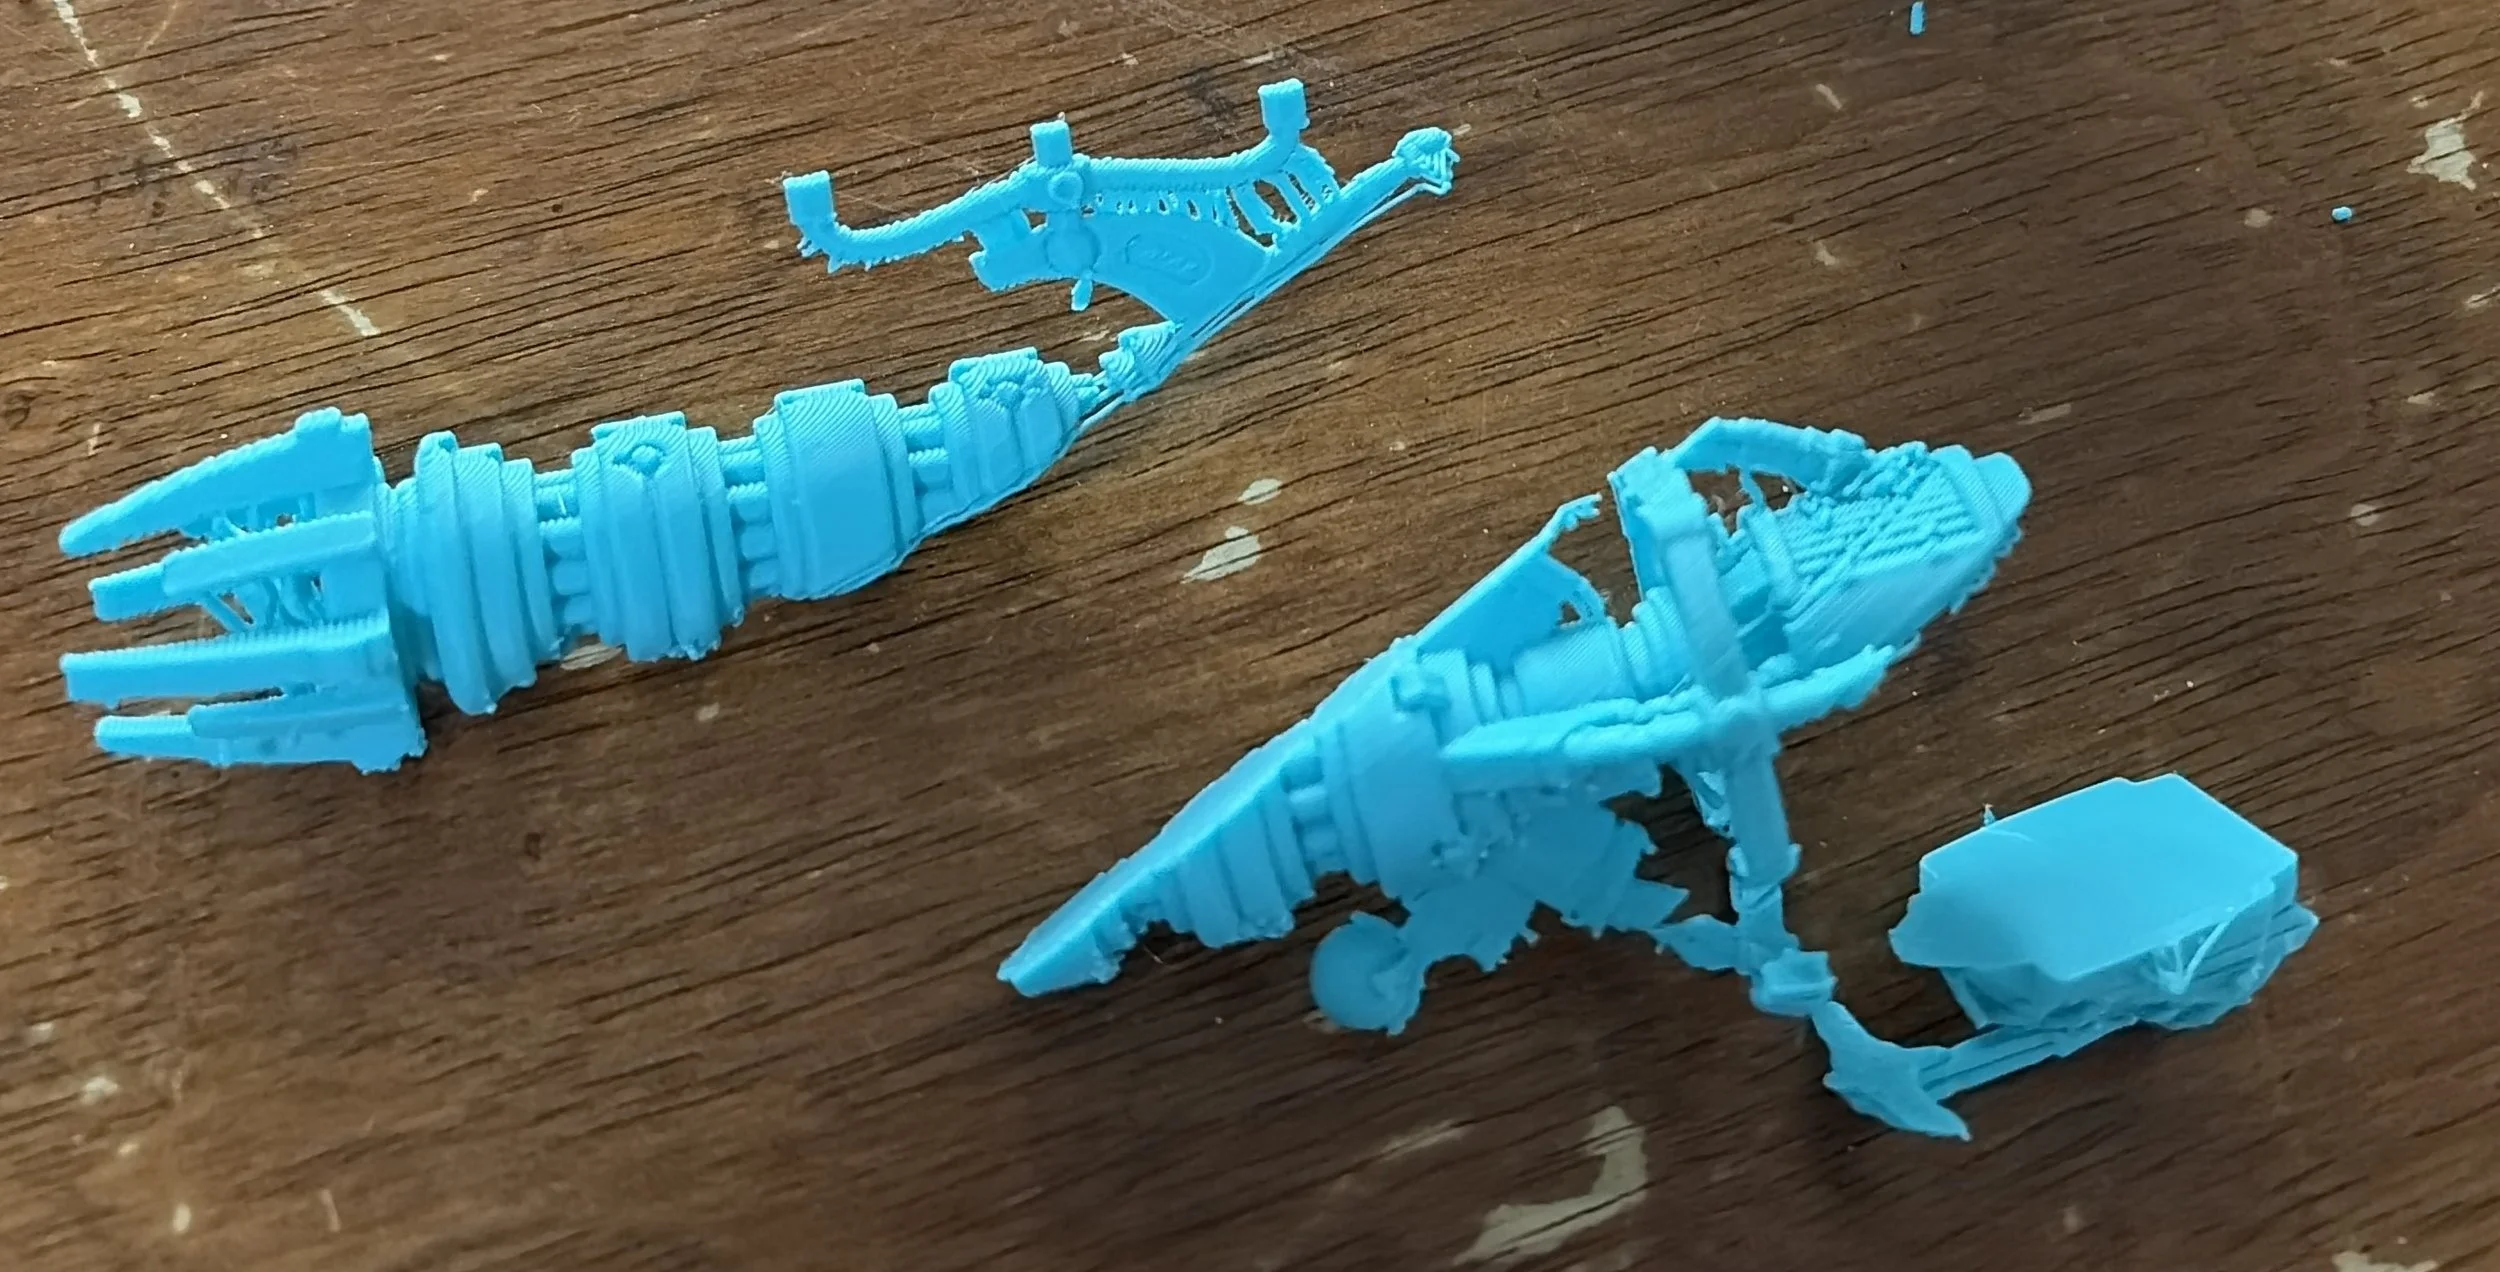
An example of a 3d print split into pieces due to non-manifold edges.
When trying to 3D print models, there are a lot of things that can go wrong. When printing an object that is supposed to be able to be set into reality, it can get really confusing when a model strips itself into slices or fails when other objects on the same plate print perfectly fine.
This was the cause of my latest hobby headache. Being new to 3D printing, I had assumed it was my fault- maybe the print didn’t adhere well to the build plate, or the print had bumped somehow. So I tried printing the object again. Somehow, the same thing was happening, and I ended up with croissant-like flakes and separation. I knew then that this had something to do with the file itself, not just my inexperience with printing.
I realized that I had not been checking my slicer settings closely, and I noticed some weird cuts happening when I sliced the model. When the model was not sliced, it looked perfectly fine. Confusion overcame me, why was the model messing up when it looked otherwise fine?
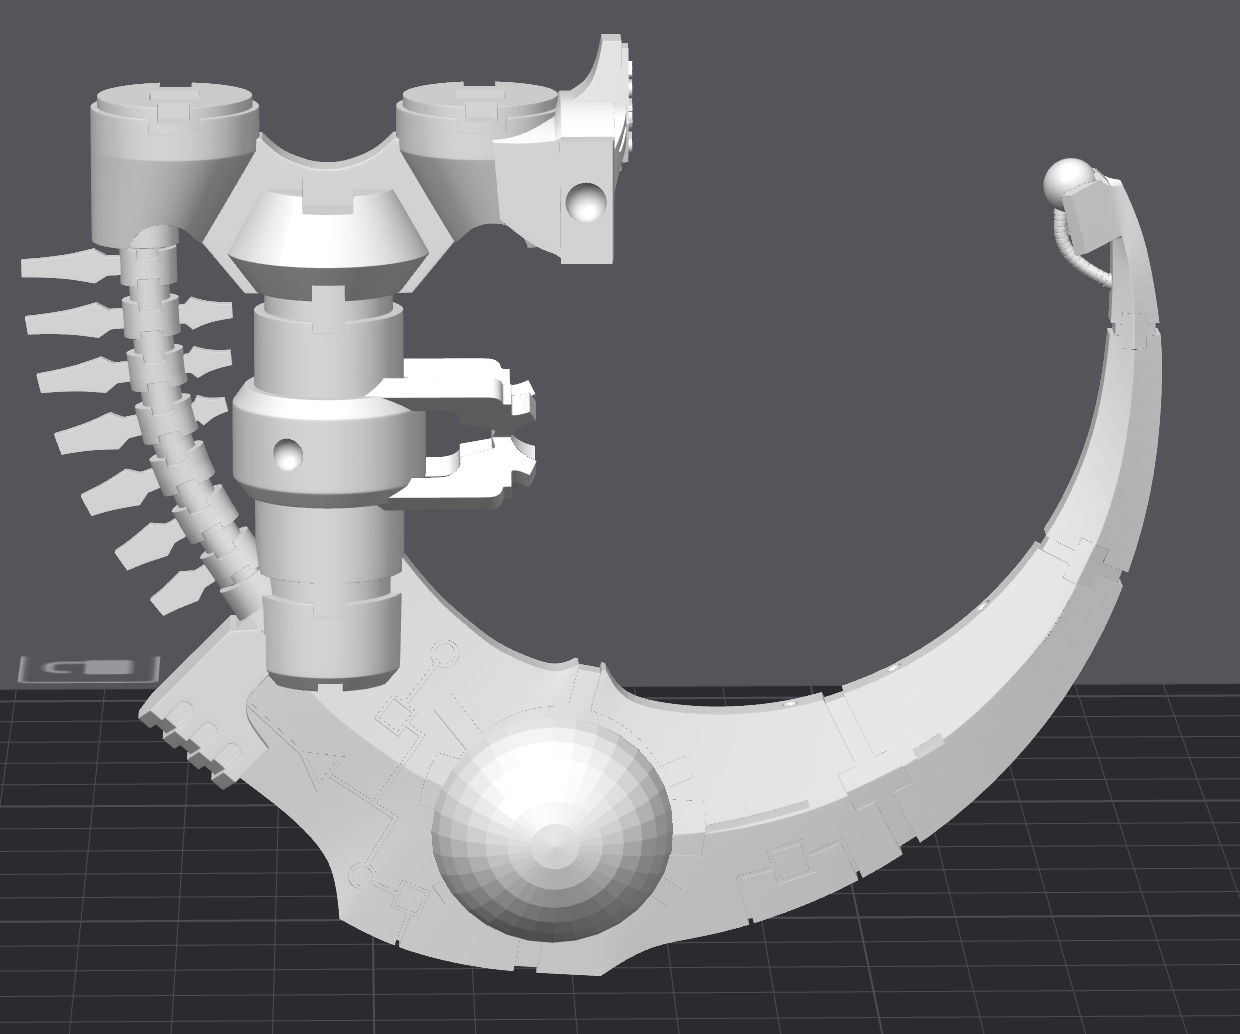
The normal model, which looks fine.
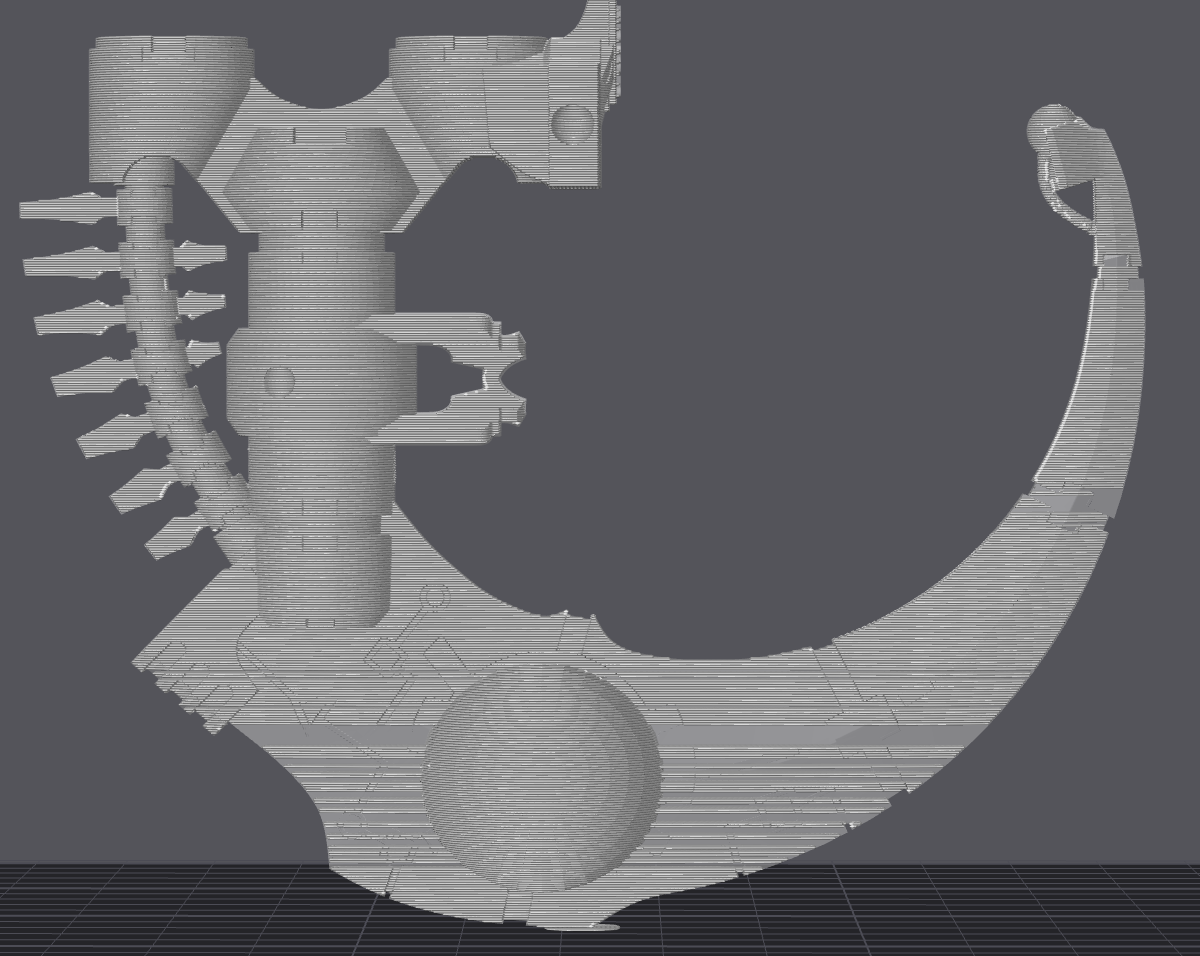
The model when sliced, splitting by random layers.
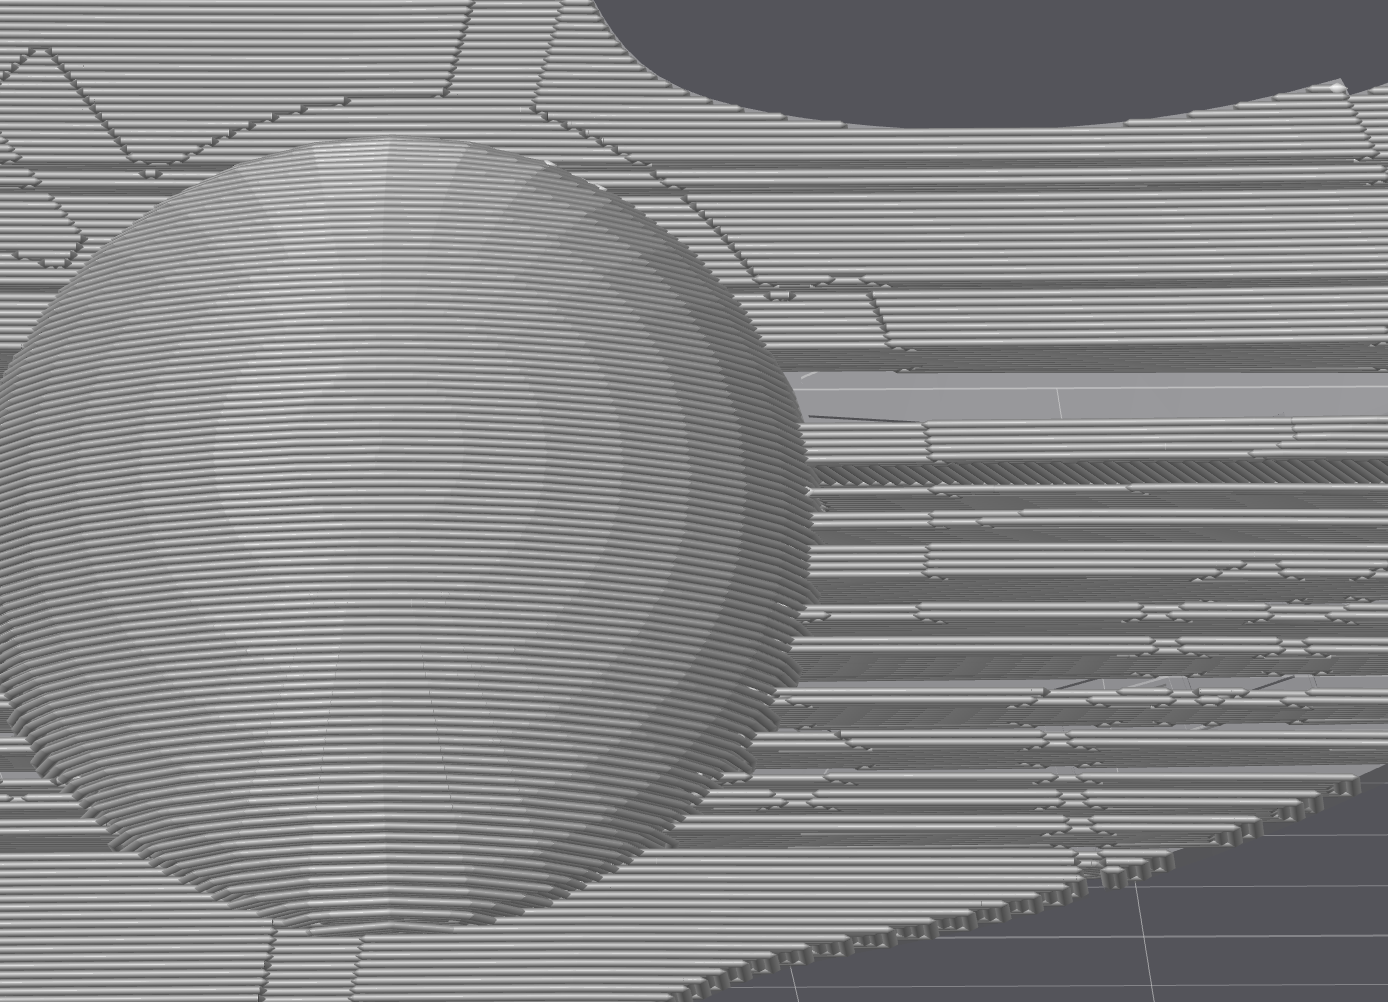
A close-up of the splitting layers.
The solution
I went to the internet in hopes of finding an answer. Luckily enough, it seemed to be pretty straightforward. I was suffering from Non-manifold edges. Essentially, the printer was trying to print impossible geometry, leading to the removal of several layers. 3D models are made out of polygons, usually squares, that have no thickness. Each polygon is made out of lines and vertices (points) that mark the end of a line. When designing a model, it’s important to keep track of your lines, vertices and polygons. These shapes combined create a mesh structure. Depending on what the model is being made for, having a messy model mesh can cause lots of problems.
For 3D printing, it's a good start to make sure the model is solid. If the model would have water spilling out when filled, the slicer won't be able to understand how to print an impossibly thin shape.

Non-manifold vertices highlighted in orange.
As well as holes being an issue, 3D prints can also have layered lines and vertices, which can further confuse a printer and cause the slicer to mangle the print. I had no idea about this- especially since I had found these files and did not make them myself.
I looked up ways to fix this. Mainly, I used blender to look at the files. I love blender for being a free program that lets you do a whole bunch of 3D work. The learning curve can be steep, and I don’t know very much myself, but having to fix these models helped me start diving into blender like I had been telling myself to for many many months.
Blender has a lot of plugins you can download that can help with different types of problems. When searching online, I found addons called Mesh Fixer and 3D Print. Mesh Fixer can help clean up messy shapes, and will try its best to make neat squares. 3D Print can check for non manifold edges, and will try to fix those.
Despite trying to use both of these addons, they were unable to fix my problem. My model was too complex for the automatic programs to handle, and so I had to manually begin to fix the mesh myself. This was confusing at first, but it got easier when I understood what I could do.
the guide
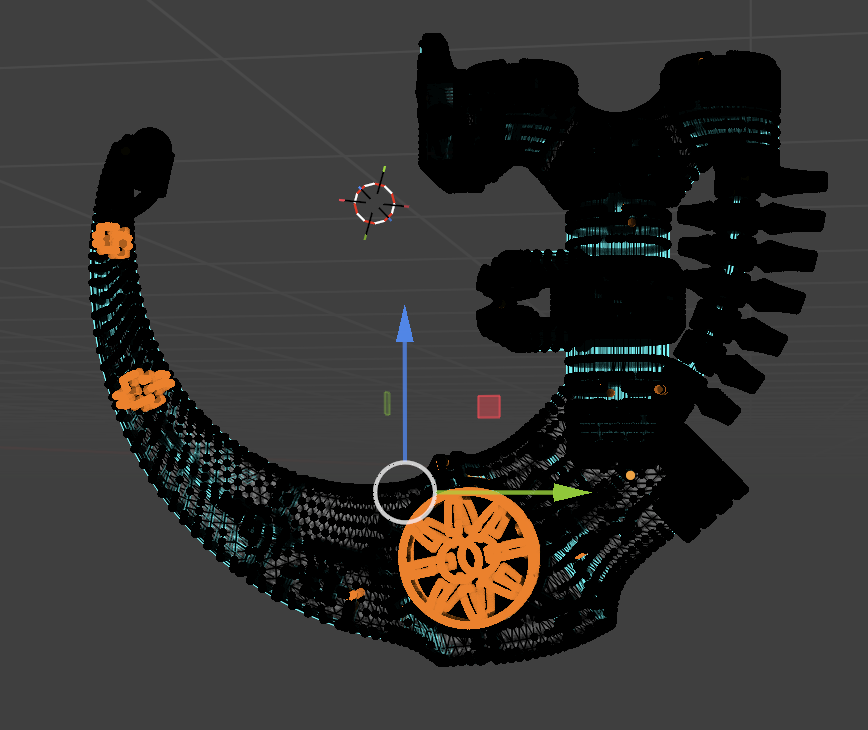
My shape, highlighted in orange where the problem areas appeared.
When you click the tab key in blender, you go into edit mode. Edit mode is required to select lines, shapes and vertices. Luckily, there is a really easy way to check which edges are non-manifold. In edit mod, as long as vertices is checked, you can go to select -> select all by trait -> non manifold. This will highlight all planes, lines and vertices that are a problem in orange.
This was a huge help in finding the problem areas in my model. It turns out, whoever made the model had created another mesh inside the outer mesh, leading to hundreds of manifold issues.
How do you fix these problem areas?
For highlighted planes, all you have to do is delete them. For lines and vertices, it gets a little trickier. Non manifold lines and vertices usually happen when they overlap, so it can be hard to find out what to remove and what to keep. Honestly, it was a good amount of trial and error for me. I tried to delete orange lines that seemed to intersect with the black lines. It was very tedious, also because you have to continuously reselect the nonmanifold edges.
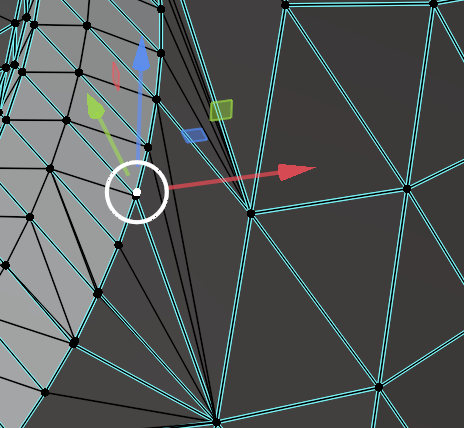
Selecting an incorrect point for deletion.
the conclusion
If I knew more about blender, I could probably have discovered a shortcut, but being fresh to blender myself I did not have that knowledge.
I did enjoy the journey though. Being able to work through problems is very rewarding, even if it can be frustrating when the solution isn’t clear. I wrote this blog to encourage people to keep trying even when it seems tough or intimidating. I’m hoping to make this a series of posts, sharing to people that we are not perfect and all knowing. Everyone has to start somewhere, after all!
So keep trying. Keep pushing through. I believe in you!
-Liv Stanis